
Every once in a while it's good to challenge yourself, to think out the processes of how to execute the procedure, and to adapt to changes brought on by obstacles in your way. Such was the case in early June getting a radio installed in my SUV...
I own a 2002 Chevy Trailblazer. It's nice, got it used almost 2 years ago, and with few exceptions have enjoyed the vehicle. I had not installed a ham radio in it as I did not have all the right equipment, the money to invest in said equipment, and I didn't want to drill holes anywhere that were visible or otherwise.
I'm not the most mechanically inclined person out there, and I am the last person you'd want to talk shop with on auto body and repair. So I met this challenge with great trepidation. Given my track record in the past, if I screwed something up, I was going to FUBAR the entire electrical system, spring a leak in the oil pan, or somehow generate a wormhole to Alpha Centauri.
 This started about a year ago. See, my initial plan was to place the antenna in much the same configuration as what is on our Windstar minivan, which was to have a mount on the rear tailgate and off to the side. Unfortunately, the Trailblazer's tailgate is set so that the windows and the metal are seamless and it's impossible to mount the Comet CP-5 in the rear. So I decided I would mount it on the hood of the Trailblazer. This has become a subject of debate for a couple of my friends and I. One thinks I'm going to cook my brain every time I key the microphone at 50w. I, on the other hand, feel less conservative when it comes to that. I've been using my cell phone for several years, and haven't felt any side effects...yet...
Next, what kind of antenna will I purchase? I have several mobile radios, the Alinco DR-135 2m with TNC, the Kenwood TM-742 tribander (2m/220/440), the Yaesu FT-1802 2m, and a beat-up but functioning Yaesu FT-5100 dual-band mobile. I also have the Yaesu FT-100D I could take mobile, and my wife's FT-7800 dual band which is in her minivan.
I purchased the Comet mount and a tri-band antenna (2m/220/440) at the Knoxville hamfest last June (as in 2008). I figured if I was going to invest, I might as well get one for all three bands on my mobile radio collection. Somewhere in this house (I think) is the ATAS-100 antenna for the Yaesu FT-100D. I misplaced it after a Field Day some years ago and unless someone swiped it (which in my world is possible) I just have yet to find it.
I started initially by asking questions on both ham radio forums and on forums for Trailblazer owners. I wanted to get as much info as possible. I had people who were TB owners, Chevy mechanics, and even a pro installer helping me out as much as possible. Through it all, I kept putting it off because I just didn't want to drill a hole in the firewall or, as mentioned before, tear something up that would end up being a $4000 repair job. I even began calling around to see what estimates the pro installers would want to put it in, I was that intimidated by the project.

Every so often I would glance into the engine or under the carpeting to see where I could poke a hole if need be. However, I never quite made the connections between where the grommet was that would go into the engine compartment. Again, my naiveté in all things mechanical prevented me from connecting the dots. In April my wife decided we needed to go visit her sister's home in Iowa. The trip would be in the Trailblazer. When the plans were finalized, I decided to buckle down and get the radio installed. So, I concentrated on the antenna first, and would worry about the radio later.
Day 1: Questions, questions
For months off and on, I probed the forums and asked about where the plugs/grommets/holes were supposed to be. As things ramped up on getting the trip planned, so too, did I re-visit the issues on the forums. I studied the forums for signs of where to install the radio (didn't want it on top of the dashboard, and couldn't fit in between the seats). I finally found a forum thread where a user had installed a ham radio in his TB and he mentioned the location of a rubber grommet, and I went outside (at 11 at night) and found it. Okay, so part of the mystery was solved. Now, how to either widen the hole in the center (which was tight due to the wires already occupying the center of the grommet) or to loosen it and fish the wires through. Again, my reservations crept up as I once again did not want to poke a hole, and have it hit the wiring and shock the hell out of me or short the entire dashboard to oblivion.
Once I was assured I was not going to electrocute myself, or go broke fixing a screwup, I bought an awl just for the purpose of poking through the grommet. Then I embarked on a search for the infernal T-connectors that no one seems to carry, yet every damned one of my radios (sans the FT-100D) has them out of the box. Go ahead and try to find them at your local shops. I dare you. I twittered my contacts, which spilled onto my Facebook page (my "tweets" also simulcast to Facebook) and no one could help except for a link to Powerwerx.com. I tried hardware stores, Radio Shack, and even a CB shop, to which I was met with the somewhat-unsurprising, "Sir, I have NO idea what in hell yer talkin' bout" response. Nevertheless, imagine my surprise when I remembered there was a spare cable at home in the FT-1802's box, freeing me the agony of having to go through the ordeal I just embarked. I'm a glutton, I suppose. But now I have the two things I need to get the party started, along with the antenna mount and antenna.
Day 2: Shock and awl
After work the next day, I come home and start to gather all my items for the install. I've got most every tool I can imagine, most others I can't, and the assortment of implements of destruction to carry out the deed. I get the awl ready to go and aim at the target, the grommet. I gingerly work the awl in, and to my surprise, no sparks, smell of ozone, and no electrocution!
So now I go find out where the grommet exited:


The grommet going into the engine was basically staring me in the face all this time. I never realized the grommet set so high into the engine area. I thought it was much lower. So much for my depth perception...
So I then start to wiggle the awl around and try to widen the hole. As I'm reaching for my pocket knife, the grommet pops off one side. "Great", I thought, but as I checked, it seemed like it would be the optimal place to fish the wire and antenna coax through, so I decided to simply route the wires through the side. The result is below:

Not the greatest job, I'll admit, but for what I needed, it works. I'm going to re-work it later on to where the grommet has a better seal overall.
 So I get the power cable in, then the antenna is next. It, too, easily goes in with little convincing. The antenna was mounted to the hood in little time (pic to the left), and I feel like I'm making great progress. I install split flex tubing around the antenna and power cables, then have to stop everything and make a quick run to pick up one of my kids from a friend's house.
Upon returning home, I work on getting the power cable into the battery. Boy was that a riot! Without boring you, I'll just say it took 2 hours, yelling at the connector, cursing deities for smiting me, shaving off some of the rubber insulation around the battery connector to fit the wire into the bolt so it would have a firm connection, and divorce lawyers on standby.
After that odyssey, night fell, and it was time to call it a night. 7 days to Iowa, and I started to feel pressure. Just how easy would the install be?
Day 3: A mobile conundrum
Again, I am working, and I spent part of the day (and my lunch hour) scouring for ideas on where to put whatever radio I was going to use. I got home and the weather was getting stormy, so I decided I'd work on my Yaesu FT-5100 and try to blow the cobwebs off and see if I could make it mobile-ready. My wife was at work, and the kids were antsy due to the storms and lightning in the area, and I took my radio, old Radio Shack (errr...sorry..."The Shack") magnet mount antenna, and a power supply upstairs to work on programming it while the rain came down.
I stuck the mag-mount sideways onto my tower, and fed the coax in from the back door to the dining room table. I hook everything up and start to try and sort out the radio's startup issues (apparently it was modified, and a very complicated process had to be done to just get the radio to get into the proper bands for starting up, as well as discovering the battery in the radio for memory was apparently long-dead) and the rain outside turns to a monsoon. My tower is located next to the gutter, and the gutter became clogged. Niagara Falls is now right outside my door, so I venture out to unclog the gutter. As I grab a clump of...something leafy, brownish, and soggy, I toss it over the opposite side of the tower, but it hits the mag-mount and takes it down. The mag-mount falls, and the attached coax yanks the radio off the table.
At first, it appears that everything is fine, and I pick up the radio and reconnect it. But when I power the radio back on and push the "Function" button (F/W) it's stuck. As are two other buttons on the face plate. It appearently landed on the VFO knob and jammed the front good and solid. I didn't pay a lot for the radio, and apparently I got what I paid for. Karma is not shining well on me.
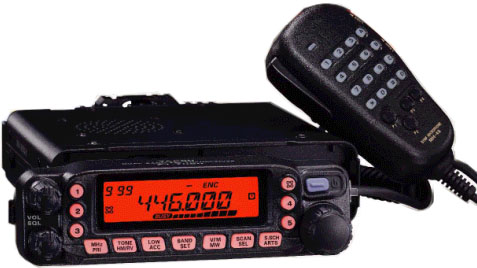
So I look at my other multi-band radios. The Kenwood 742 tri-bander (which I do not have a mount for), my FT-100 (wrong power connector), and my monoband FT-1802. My wife tells me to take the 7800 out of her minivan and use it for the trip, since she seldom uses it when she drives the minivan (unless I'm driving in a caravan or using it while driving her car). I decide it's the best option since it did have 440 capability. So after the monsoon, I went out at 11PM-ish and took the radio and mount out of the minivan and took it back to the Trailblazer. The 7800 was set up with the radio's chassis in the back of the van, and the faceplate (separated) in the front of the minivan. So imagine my surprise when I can't find the cable to connect the faceplate back to the chassis, just the 20' long cable from the back to the front...
So I have a couple of options, find a place to mount the chassis SOMEWHERE up front, and put the face up on the dash, or try to get a new cable made for mounting the radio to the chassis. Ant this is not just any cable. It's RJ-12. Picture normal telephone cable (RJ-11). It has 4 wires. RJ-12 fits a plug the size of RJ-11, but it has 6 wires. This is not going to be easy to find, it appears. So, I leave the radio in the car and go back inside, feeling modestly defeated. Another day, another setback.
Day 4: CABLE GUY!!!!
I get to work the next morning, the radio riding shotgun since I hadn't mounted it yet. I get to work and ask a co-worker if he had crimpers at his house (he used to be a cable installer). Unfortunately he didn't have any equipment anymore as he sold it all years ago. I take one of my breaks and run out to a wiring supply store located across from the place I work, and ask for RJ-12 cable. They said they didn't carry any there, that it was special order (and in 1000' rolls) and that I would need a lot of luck finding some in Oak Ridge. I thought it funny, because, well, Oak Ridge did have a little technological history here and there...
I go back to work and talk more with my co-worker, and he suggested buying crimpers and checking Home Depot for the plugs, and take the 20' cable I had and cut off and end and cut it for the 3" piece I needed for the direct connection between the chassis and faceplate. So I run to the Home Depot during lunch, and I buy crimpers that were cheap, but were "designed for RJ-11/12 connectors". And by good fortune, they did indeed carry RJ-12 plugs! I do love that place sometimes...
I ran back to work, wolfed down my lunch, and worked on the cable. I cut one end, hooked up the cable in the proper orientation (based on how the original cable was set, you have to flip the connector's wires) and crimped.

I get out to the car, remove the crimpers, and with a quick bit of careful pressure, had me a connector cable for the radio! I placed the faceplate to the chassis (a bit of a struggle because the cable was 1/4" too long) and plugged in the radio and antenna. Life was good! I might get this thing installed after all.
I get home and get to work on the mounting of the radio. I snake all the excess wiring under every crevice I can think of, under the carpeting, behind the center console, under the console, etc. I decide that the best place for the radio is below and to the right of the steering column, where I had seen another person on the Trailblazer forum mount his radio.
I mount the bracket, putting two small holes "conveniently" out of view. It was here that I faced yet ANOTHER issue. I put the bracket so close to the center console I had little room for the screws with which to mount the damned radio!
BUT...I refused to be set back anymore. I was able to use a magnet screwdriver to hold one screw in place while getting the radio mounted in the bracket. I used what little space I had and needle-nosed pliers to put the final twists on this odyssey. A couple of zip ties later, I finally have my radio installed!
The finished product is below:


So, if you've made it this far, you have (hopefully) gone through the best/worst of times, just as I did (I have a habit of wanting to make the reader emotionally involved in my stories).
I learned a lot about this install. Mainly I learned I could actually do it. Most other times I've had someone install it with me or for me. It built up confidence I needed, and hopefully will not be so intimidated on my next install.
My next post will be what happened on the way to (and in) Iowa on the radio. Was it worth the trouble getting a radio installed? Stay tuned. I'll have it posted in the next week.
I really loved reading your blog. It was very well authored and easy to undertand. Unlike additional blogs I have read which are really not tht good. I also found your posts very interesting. In fact after reading, I had to go show it to my friend and he ejoyed it as well!
ReplyDeleteHome depot dealers Toronto